If you’ve ever looked down at your tiled floors or glanced at your bathroom walls and noticed those ugly dark or yellowish stains creeping into the grout lines, you’re not alone. Grout is the unsung hero that holds your tiles together, but it’s also the first thing to show dirt, grime, mold, and mildew. Cleaning stained grout is often a challenging chore, but the good news is you don’t have to replace tiles or spend a fortune on professional services.
In this article, we’ll walk you through eight proven, easy, and affordable ways to clean stained grout. I’ll share simple DIY methods, commercial product recommendations, and even a few natural home remedies. Whether you want to freshen up your kitchen backsplash or restore your bathroom floor, there’s something here for you. Plus, I’ll cover how to maintain your grout to keep it looking fresh for longer.
Tools & Materials You’ll Need
Before we get started, let’s talk about the essential tools and materials you’ll want to gather. Having the right equipment makes grout cleaning much easier and more effective:
- Medium-bristle brush or grout brush: A stiff brush is key to scrubbing away grime but avoid wire brushes that can damage grout.
- Spray bottles: Useful for applying homemade cleaning solutions evenly.
- Buckets: For mixing solutions and rinsing.
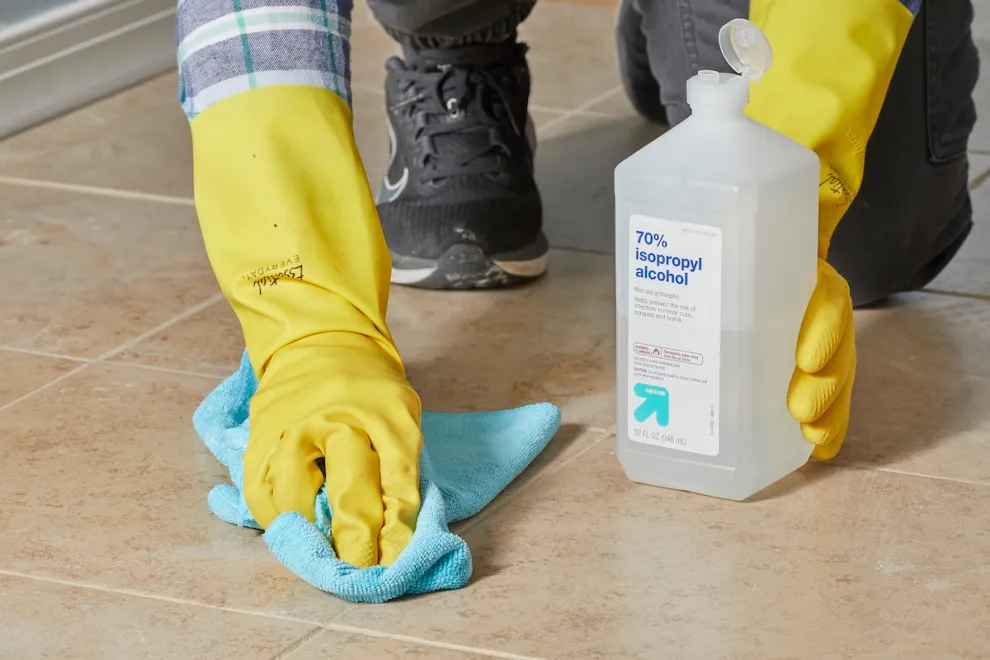
- Rubber gloves: Protect your hands from harsh chemicals and grime.
- Microfiber cloths or rags: For wiping down surfaces after cleaning.
- Mop or sponge: To clean larger areas and rinse.
- Steam cleaner (optional): For a chemical-free deep clean.
- Grout sealer: To protect grout after cleaning.
Types of Grout
Not all grout is created equal, and the type you have will affect which cleaning methods are safest and most effective:
- Cementitious Grout: The most common type, it’s porous and can easily absorb stains. It benefits the most from sealing and gentle cleaning.
- Epoxy Grout: Non-porous and highly resistant to stains, but tougher to clean once dirt builds up.
- Urethane Grout: Flexible and stain-resistant, easier to clean than cementitious but less common.
Pro Tip: Always test any cleaner on a small, hidden spot first to ensure it won’t discolor or damage your grout.
1. Scrub Dirty Grout Using Warm Water and a Medium-Bristle Brush
Sometimes the simplest method is the best place to start—especially if your grout is only lightly dirty. Wet the grout lines with warm water and then scrub using a medium-bristle brush. The warm water loosens surface dirt, and the brush helps break up grime.
Why it works: This method is gentle and won’t damage grout or tiles. It’s great for routine cleaning or prepping grout for deeper treatments.
How to do it:
- Wet the grout with warm water using a sponge or spray bottle.
- Scrub back and forth with a medium-bristle brush. Focus on small sections at a time.
- Rinse with water and wipe with a cloth.
User Insight: Many homeowners find this a perfect weekly maintenance step, preventing buildup that requires harsh chemicals later.
2. Spray Grout with Equal Parts Vinegar and Warm Water
Vinegar is a natural disinfectant and cleaner that can work wonders on grout stains caused by mildew or soap scum. Mix equal parts white vinegar and warm water in a spray bottle and apply directly to the grout.
Why it works: The acidity in vinegar breaks down mineral deposits and kills mold. Plus, it’s eco-friendly and cheap.
How to do it:
- Spray the vinegar-water mix generously on grout lines.
- Let it sit for 5–10 minutes to loosen stains.
- Scrub with your brush, then rinse with water.
Important: Avoid vinegar on natural stone tiles or unsealed grout as the acid can etch or damage these surfaces.
Review insight: Users love this method for its simplicity and natural ingredients, but many caution it’s best for light stains and frequent use.
3. Apply a Baking Soda Paste, Then Spray with Vinegar
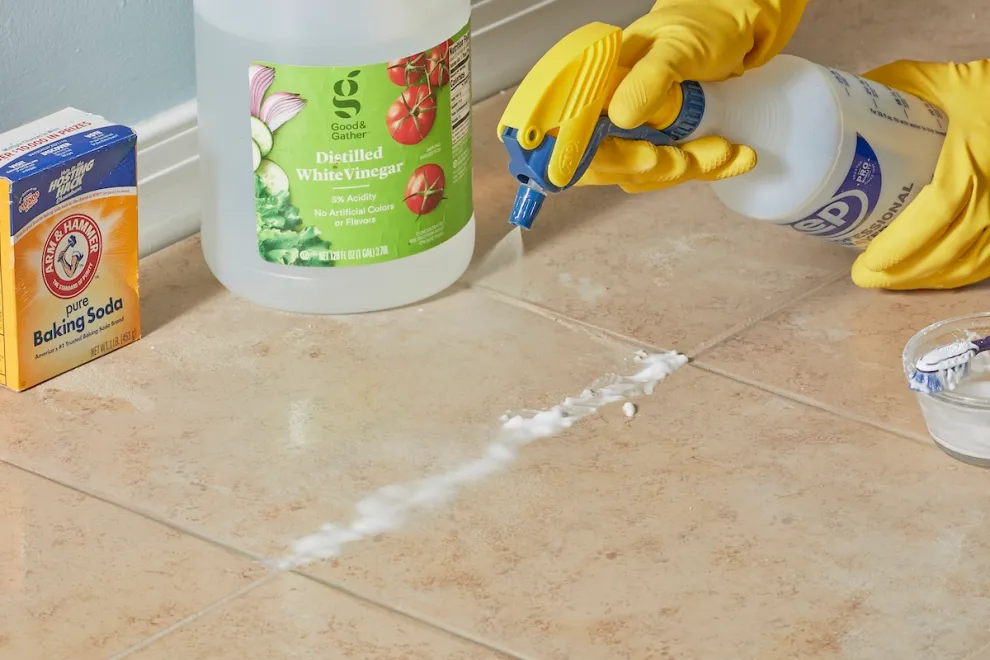
This one’s a classic science experiment meets home cleaning! Baking soda is mildly abrasive and works with vinegar to lift stubborn stains.
Why it works: Baking soda’s gentle abrasion scrubs grime, while vinegar’s acidity foams and breaks down dirt.
How to do it:
- Mix baking soda with a small amount of water to make a paste.
- Spread the paste over grout lines.
- Spray the vinegar-water solution over the paste. It will fizz—don’t worry, that’s the cleaning magic.
- After 5–10 minutes, scrub with a brush, rinse thoroughly.
Pro Tip: For extra power, repeat the process on tough stains.
Customer reviews: This combo is a favorite DIY tip online because it uses ingredients found in every kitchen and avoids harsh chemicals.
4. Pour on Some Hydrogen Peroxide
Hydrogen peroxide is a mild bleach and disinfectant that can brighten grout, especially white or light-colored grout.
Why it works: It oxidizes stains and kills mold spores, restoring grout’s original color.
How to do it:
- Apply hydrogen peroxide directly to grout lines.
- Let it sit for 10–15 minutes.
- Scrub with a brush and rinse well.
Safety tip: Test first on colored grout to avoid fading. Use gloves to protect your skin.
User feedback: Many users find hydrogen peroxide effective for whitening grout without the harshness of chlorine bleach.
5. Apply Oxygen Bleach and Let It Stand for Up to 15 Minutes
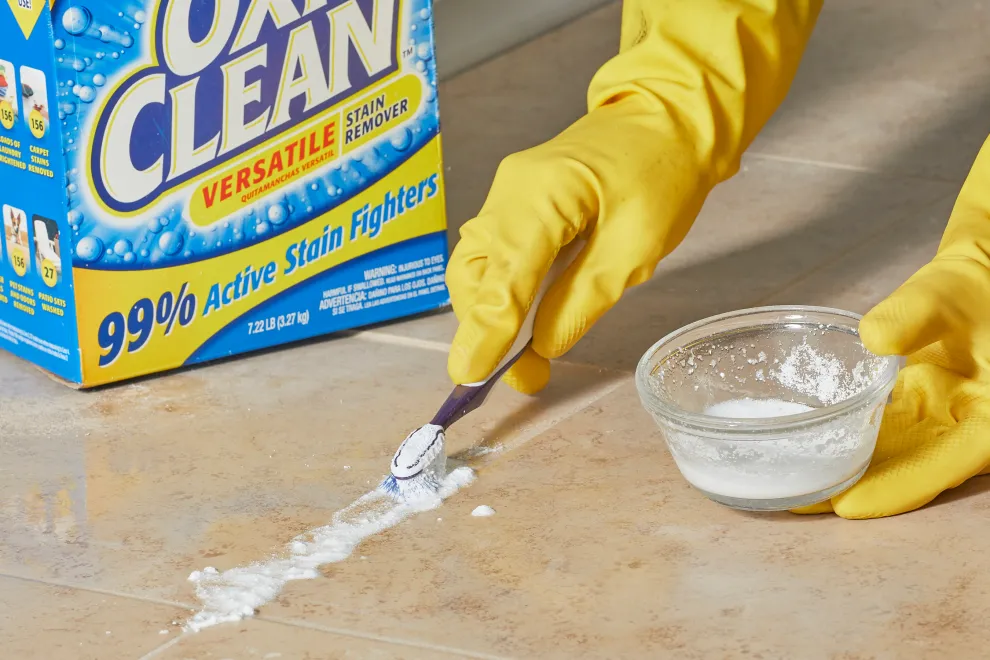
Oxygen bleach (such as OxiClean) is a safe, non-chlorine alternative that works well on grout stains.
Why it works: Oxygen bleach releases oxygen molecules that break down organic stains and dirt without damaging grout.
How to do it:
- Mix oxygen bleach powder with water according to package instructions.
- Apply to grout with a sponge or brush.
- Let sit for up to 15 minutes.
- Scrub and rinse thoroughly.
Note: Avoid using oxygen bleach on natural stone.
Consumer reviews: This is a popular choice for heavy-duty stains with many praising its stain-lifting power without harsh odors.
6. Try a Commercial Grout Stain Remover
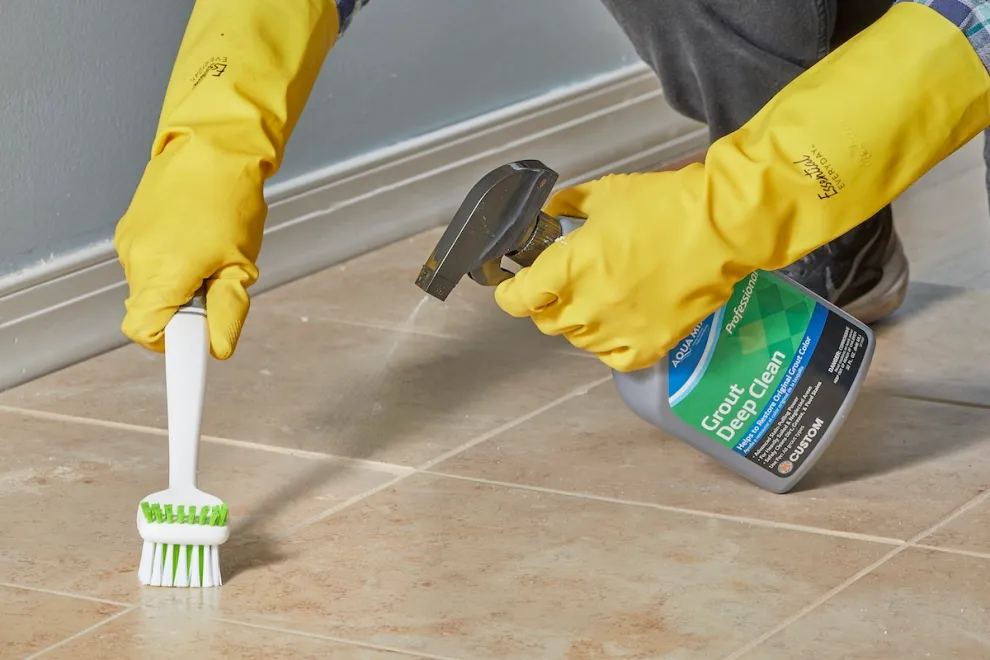
When home remedies aren’t enough, commercial grout cleaners step in. There’s a wide range, from sprays and gels to powders.
Why it works: These products often contain stronger chemicals designed specifically to tackle tough grout stains.
How to do it:
- Follow the product’s instructions carefully.
- Apply the cleaner, allow it to sit as directed.
- Scrub with a grout brush and rinse well.
Safety first: Use gloves, ensure good ventilation, and keep products away from children and pets.
User insight: Reviews vary by product, but top-rated commercial removers get high marks for ease of use and effectiveness on stubborn stains.
7. Steam-Clean the Worst of Grout Stains
Steam cleaning is a fantastic chemical-free way to deep clean grout. The heat and moisture loosen dirt and kill mold.
Why it works: High-temperature steam penetrates grout pores, loosening grime for easier removal.
How to do it:
- Use a steam cleaner with a grout brush attachment.
- Slowly run the steam cleaner along grout lines, applying steam evenly.
- After steaming, scrub lightly with a brush and wipe clean.
Benefits: Steam cleaning is eco-friendly, doesn’t require chemicals, and sanitizes surfaces.
User experiences: Many users report excellent results, especially for bathroom grout, and appreciate the chemical-free method.
8. Use Chlorine Bleach Sparingly on Grout
Chlorine bleach is a powerful stain remover but should be used cautiously because it can damage colored grout and irritate skin and eyes.
Why it works: Chlorine bleach kills mold and lightens grout dramatically.
How to do it:
- Dilute bleach (¾ cup bleach to 1 gallon water).
- Apply to grout and let sit for 10–15 minutes.
- Scrub and rinse well.
Warnings: Only use on white grout, never mix bleach with ammonia or other cleaners, and use in a well-ventilated area.
Customer caution: Some users warn that bleach can weaken grout over time, so use it sparingly and as a last resort.
Grout Maintenance Tips
Once you’ve got your grout clean, keeping it that way is easier with a few smart habits:
- Seal grout lines: A good grout sealer creates a barrier against moisture and stains. Reapply every 6-12 months.
- Regular cleaning: Sweep or vacuum to remove dirt before it settles into grout.
- Wipe spills quickly: Especially in kitchens, don’t let oils or colored liquids sit on grout.
- Improve ventilation: Use exhaust fans to reduce moisture buildup, especially in bathrooms.
Final Thoughts
Cleaning stained grout is a task that many homeowners dread, but it doesn’t have to be overwhelming or expensive. With the right approach and a bit of patience, you can restore your grout to a clean, bright condition that enhances the overall look of your tiled surfaces. The key is understanding your grout type, choosing the appropriate cleaning method, and maintaining a regular cleaning routine to prevent stains from becoming deeply embedded.
Starting with simple methods like scrubbing with warm water or using a natural vinegar solution is a great way to tackle light dirt and mildew without risking damage to your grout or tiles. These gentle approaches are ideal for routine upkeep and can often keep grout looking fresh for weeks at a time. For those tougher stains, baking soda and vinegar paste, hydrogen peroxide, or oxygen bleach can be highly effective without resorting to harsh chemicals. These options offer a balance of power and safety, particularly for homeowners who prefer environmentally friendly solutions.
Commercial grout cleaners provide a strong, targeted attack on stubborn grime and discoloration, but they should be used carefully. Always read product labels, follow instructions, and ensure adequate ventilation when using these chemicals. Chlorine bleach, while powerful, is best reserved as a last resort due to its potential to discolor or weaken grout, especially colored grout. Using bleach sparingly and only on white grout helps protect your investment in your tile surfaces.
Another increasingly popular and eco-friendly method is steam cleaning. It offers deep cleaning power without chemicals by using high heat to loosen dirt and sanitize grout lines. Steam cleaning is especially suitable for those with chemical sensitivities or anyone looking to reduce their environmental footprint.
No matter which method you choose, the best results come from regular maintenance. After cleaning, sealing your grout lines creates a protective barrier that helps repel water, dirt, and stains, making future cleaning easier. Simple habits like wiping up spills promptly, sweeping or vacuuming to remove dirt, and ensuring proper ventilation in moisture-prone areas can dramatically extend the life and appearance of your grout.
In summary, grout cleaning is manageable, cost-effective, and rewarding when done right. By starting with the gentlest methods and gradually moving toward stronger treatments only if necessary, you can keep your grout—and your home—looking fresh and inviting for years to come. Remember, a little effort goes a long way in protecting your beautiful tiled surfaces and maintaining a clean, healthy living space.
FAQs
Can I clean grout without scrubbing?
Scrubbing is usually necessary to remove stains, but steam cleaning can reduce manual effort.
How long does grout sealer last?
Typically 6 to 12 months depending on wear and moisture exposure.
Will bleach damage my grout?
It can if used too often, especially on colored grout. Use sparingly.
Can I use bleach on bathroom grout?
Yes, but only on white grout and with caution.
Is steam cleaning better than chemicals?
Steam cleaning is eco-friendly and effective, but very stubborn stains may require chemicals.